Saturday, July 18, 2020

Over-Dyed Thread Storage System

~ Greetings and Warm Welcome ~

Have you been struggling trying to figure out a way to store your over-dyed and/or specialty threads and fibers? Several years ago I began storing my threads in this fashion and have found it to be a wonderful way to protect my threads from: dust, dirt and light. It is also a great way to easily organize by company line and thread name so that you can easily find and pull threads you need and then, once done with the project, replace back into the system for storage.

To store your threads in the way I do, you will need the following items: 

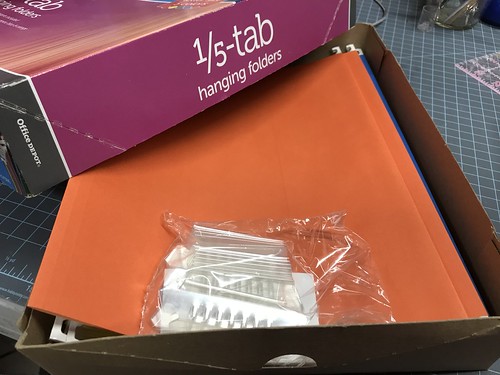
hanging file folders:
Untitled

Untitled

Untitled

Untitled

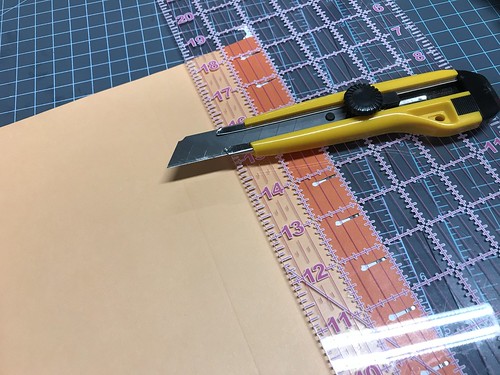
STEP ONE: measure 2 inches down from edge of one side of the file folder and cut straight across - repeat on the other side

Untitled

you will end up having this after step one.
Untitled

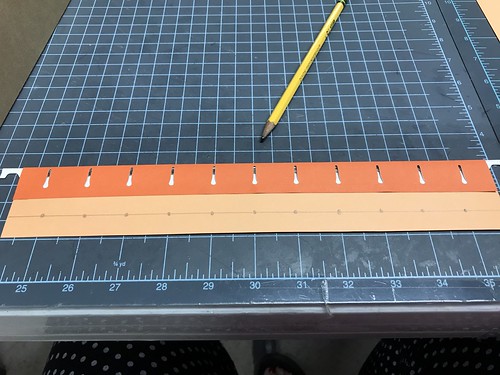
STEP TWO: Measure up from bottom edge 1/2 inch, draw pencil line. 
Then measure in (on both sides) 3/4 inch and make a dot on the pencil line. Continue down the line between the ends one inch apart making dots along the pencil line as shown:

Untitled


STEP THREE: punch out the dots along the line.

Untitled

STEP FOUR: repeat 1-3 several times until you have at least 26 file folder ends, cut and punched.

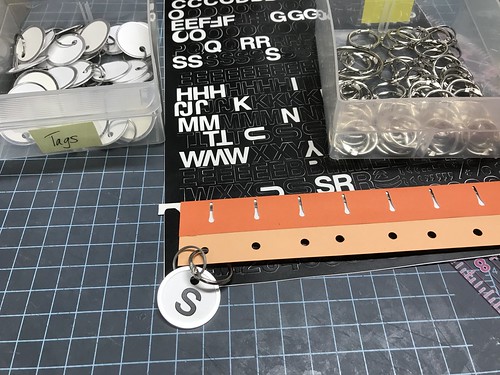
STEP FIVE: stick vinyl letters on key tags a-z, hook key tag onto book ring and then onto the end of one of the file holders as shown:

Untitled


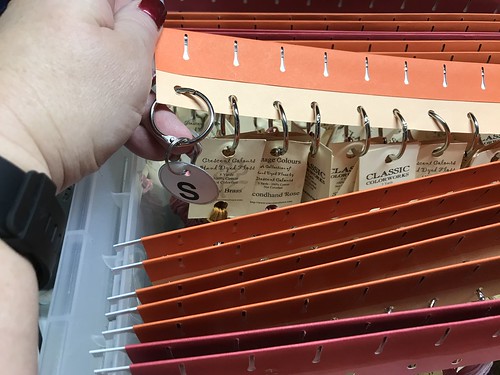
STEP SIX: load the file folder end with rings containing threads corresponding to the letter on the key tag for that row. *note* you may need more than one file folder for a letter in the alphabet - I just make the files with the same letter so that they all can hang together when set is complete.
Untitled

STEP SEVEN: add your file alphabetically to your box or cabinet.
Untitled

if you have a file holder box you will be able to see your threads arranged alphabetically from the side, and be able to immediately locate and find the thread you are looking for:
Untitled

I put the name of the thread company on the front of my file folder box. 

Untitled

This system would be fine housed in an actual file cabinet, but I used hanging folder file boxes for mine. I have a box for Gentle Arts, Weeks Dye Works, Classic Colorworks cottons and silks and NPI silks. This system works well for all of these lines. NPI does not use letters for identification, I store those by their identifying number instead. 

Simple, right?! 
It's a great way to store your threads! Do you plan on using this system? that's great! Just remember where you saw it and who taught you to do it this way. I love to share freely and abundantly, but it is only fair to give credit, where credit is due. Use my tutorials (completely or partly) - I don't care who you are - the appropriate attribution of anything you learn from me or someone else - is to name that person in a social media post, blog post or by word of mouth. 
Thank you for your attribution, acknowledgement of the time it takes to write and share tutorials. That's all the thanks I need. 
Monday, July 13, 2020

Punch Needle Gadgetry

~ Greetings and Warm Welcome ~
how about we learn about punch needle?!
I have made two videos that describe punching gadgets, how I use them and teaching my viewers how to punch. 
You may find them at the links provided: 
Adventures in Thread - Episode 1: Punch Needle Basics: HERE
Adventures in Thread - Episode 2: Punch Needle Part 2 - Expanding our knowledge: HERE

I find punch needle and the rhythm of it therapeutic and relaxing. It is so easy to set and just punch away as you watch television or sit on your porch.
There are some tools of the craft though that make punching very much easier and here are my top picks. 

PUNCH NEEDLE: 
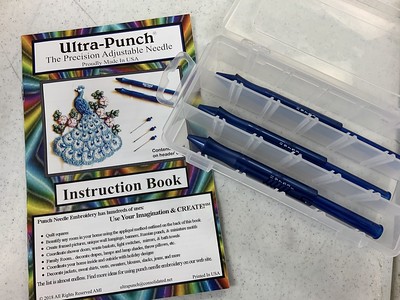
Ultra Punch - absolutely the best punch needle in my opinion. The punch needle sets come with:
1 ultra punch
3 sizes of needles: small (1-3 strands of floss), medium (3-6 strands of floss) and large (yarn, metallic flosses, ribbons, etc.
2-3 threaders
1 pointed tip spring (for use with needle sizes: Small and Medium)
1 round tip spring (for use with needle size: Large)
Ultra punch instruction booklet

Untitled
*NOTE* I own three Ultra Punch punch needles because I like to thread them all up and have them waiting so I don't have to take time to stop and thread them over and over. If they all are threaded up with the colors I'm punching when one runs out I pick up the next one.

*PLASTIC CASE* I house my Ultra Punches in a plastic case. I purchased this case 15+ years ago. I have no idea where it came from and there is no identifying information on where I got this or who made it. There are several companies that make plastic cases, I believe this one could be an ARTBIN case, but even a child's pencil case for school or a small cigar box can house your Ultra punches. I DO recommend getting some sort of case to carry them in as it keeps them housed and protected.
*always* retract your needle back inside the barrel of your Ultra Punch when you are finished punching for the day. This protects the needle sharpness and your fingers when you go to grab it!
HERE is a case that I believe is very similar to mine.
THREADERS
I buy them in large quantities. You cannot use your Ultra Punch unless you have a threader...you MUST have one. *and* they are easy to lose...BUY SEVERAL THEY ARE IMPORTANT!!

Untitled

HOOPS OR STANDS

You will need something to hold your weavers cloth DRUM tight. (a Q-snap, scroll frame or regular hoop will not be sufficient) you will need either a:

Morgan Lip Locking Hoop
Untitled

These hoops are easily found at any Local Needlework Shop either brick and mortar or online.
You must have a hoop large enough that all of the punch needle design lies within the hoop meaning you will not have to move the hoop around as you cannot re-hoop over the punch needle as it will ruin the pile of the project.

Morgan also makes a lovely lap/table stand as you can see below: one may use either side as they come in different hoop sizes on top and bottom. 


morgan

I prefer to use a small punch needle/rug hooking stand. Mine was purchased long ago at a rug hooking shop. However, they are available at: The Old Tattered Flag (also the owners of Ultra Punch Needle Punches) You may find them on line: HERE


Untitled

THREAD SEPARATING TOOL

Made by Puffin & Company (and demonstrated how to use in my video) these little gems make separating floss a breeze. EASY PEASY - YOU NEED THIS!!

Untitled


ORGANIZING THREADS

Threads, threads and more threads I use: clothespins (with number of color written in pencil so can be erased and used over and over)

Untitled


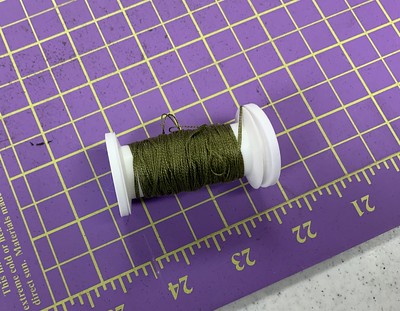
Or I also save old plastic (or wooden) spools of sewing thread to wrap my separated or ready to punch floss.

Untitled

Either of these ways organize the threads beautifully so that they don't get tangled or lost.

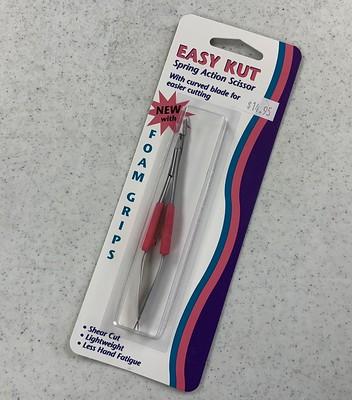
CURVED BLADE SCISSOR SNIPS
The ones below are the ones I show on my videos. Available on Amazon: HERE

Untitled

I also have curved blade scissor snips by Artman - also available on Amazon: HERE

Of course there are SEVERAL varieties of these curved blade scissor snips, and they all work the same.
They are fantastic tools for any of your crafting applications, quilting, sewing, cross stitch, embroidery, punch needle, endless uses and so handy to have on hand!

Have you been wanting to try punch needle? Have you tried before and need a refresher? 
wherever you may be on the spectrum concerning punch needle...watch the videos and give it a try. It is such a wonderful, relatively quick craft to learn and enjoy!

Until next time: 
Punch Happy :)
Vonna xxxx